
Network Isolation for DFIR Using Wazuh API | Open Source Incident Response (Linux Endpoints)

In incident response, speed is critical. When ransomware or a compromised system is detected, every second of delay allows threats to spread laterally across your network.
This write-up demonstrates how to implement instant network isolation using Wazuh’s Active Response API. The solution isolates a compromised Linux system in qiuckly while preserving SSH and Wazuh agent connectivity for investigation. It’s fully open source, and integrates with any automation platform that can make REST API calls.
The following sections detail the complete implementation, including all necessary scripts, configuration steps, and testing procedures.
Wazuh Manager
Define the active response commands and scripts in the configuration:
<!-- Active Response -->
  <command>
    <name>network-isolation</name>
    <executable>network-isolation.sh</executable>
    <timeout_allowed>no</timeout_allowed>
  </command>

  <active-response>
    <disabled>no</disabled>
    <command>network-isolation</command>
    <location>local</location>
    <level>0</level>
  </active-response>

<command>
    <name>network-deisolation</name>
    <executable>network-deisolation.sh</executable>
    <timeout_allowed>no</timeout_allowed>
  </command>

  <active-response>
    <disabled>no</disabled>
    <command>network-deisolation</command>
    <location>local</location>
    <level>0</level>
  </active-response>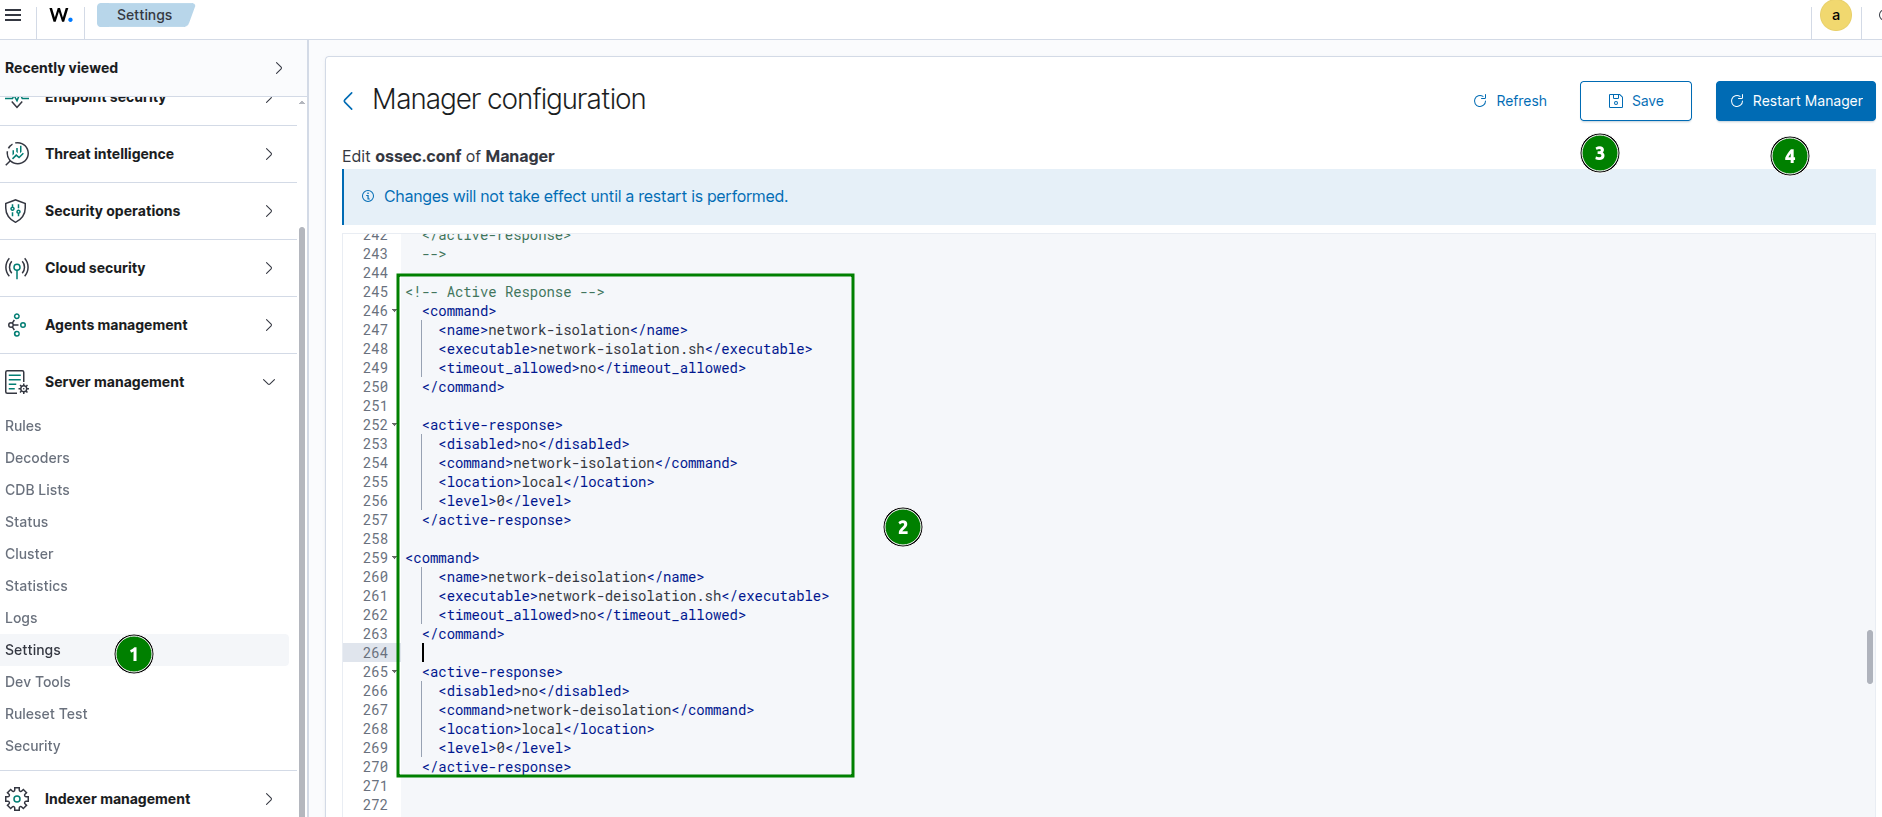
Wazuh Agent:
Place the isolation/de-isolation scripts in your Linux Wazuh agent and set the correct permissions:
sudo nano /var/ossec/active-response/bin/network-isolation.sh
sudo nano /var/ossec/active-response/bin/network-deisolation.sh

sudo chmod 750 /var/ossec/active-response/bin/network-isolation.sh
sudo chmod 750 /var/ossec/active-response/bin/network-deisolation.sh

sudo chown root:wazuh /var/ossec/active-response/bin/network-isolation.sh
sudo chown root:wazuh /var/ossec/active-response/bin/network-deisolation.sh
Scripts:
Within the scripts make sure to specify your wazuh manager perspective IP and the SSH IP if you want to keep the latter connection established:
WAZUH_MANAGER_IP=”10.0.0.10”        # Your Wazuh Manager IP
ALLOWED_SSH_IP=”192.168.1.100”      # Your SSH source IP (where you connect FROM)
SSH_PORT=”22”                        # SSH port (change if using non-standard)
Wazuh Dashboard:
Navigate to the Dev tools of Server management to run/test the network isolation/de-isolation actions:
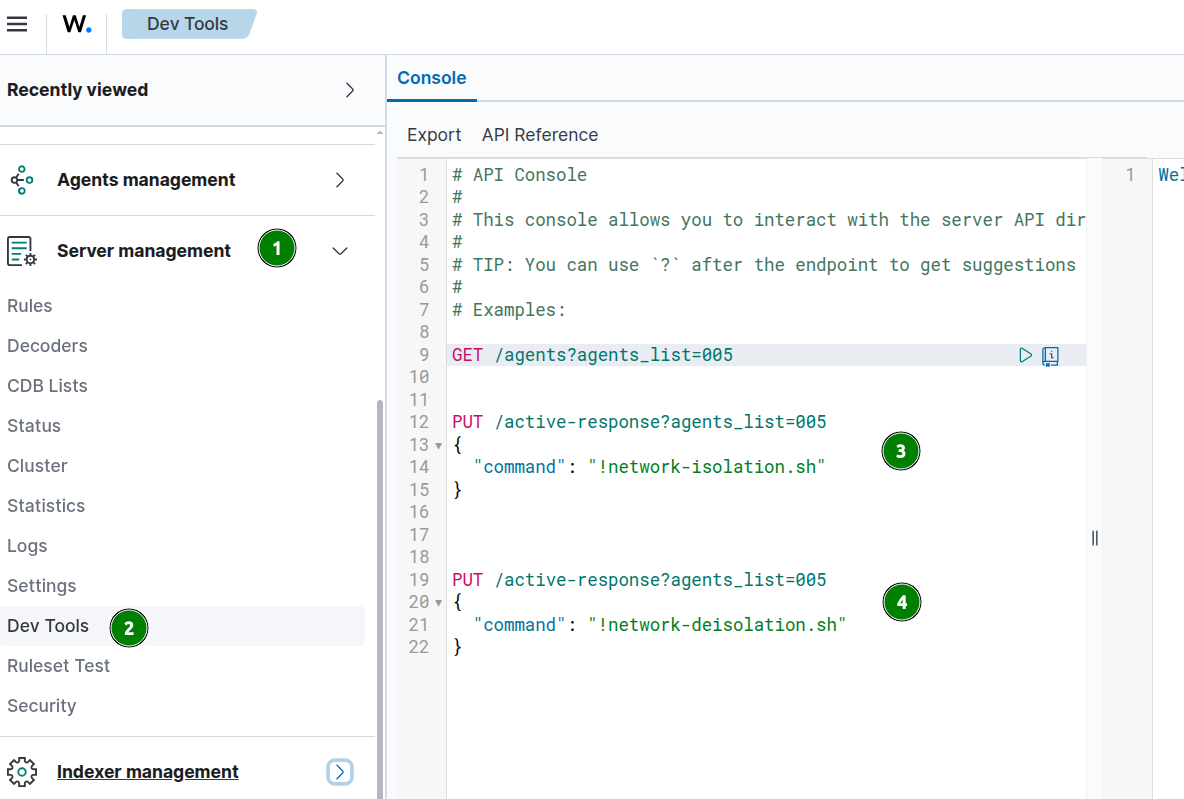
PUT /active-response?agents_list=005
{
  “command”: “!network-isolation.sh”
}


PUT /active-response?agents_list=005
{
  “command”: “!network-deisolation.sh”
}
Demo:
I hope you find it useful :)
Very Informative & helpfull
Segmenting infected hosts from the rest of the network is essential in DFIR because you need to contain the blast radius while forensics plays out. Using Wazuh's API to automate isolattion on Linux endpoints seems like a smart way to respond quickly without needing fancy EDR licensing. This kind of workflow shows how open source tools can plug into a bigger incident response plan and still keep things manageable. I like that you emphasie speed and reliability over complicated bells and whitles.